Limit access to file stored in S3 by using Cloud Front
S3 buckets provide a presigned URL that is only valid for seven days. CloudFront provide private access to objects that require more than seven days.
Seasoned technologist with 8 years of experience, successfully delivering projects and managing teams. Passionate about leveraging cutting-edge technology to solve complex business challenges across various domains. Proven track record of driving innovation, efficiency, and growth through tailored technological solutions.
Sometimes, we need to share a link to an object with specific users for a given period. For example, sending monthly PDF invoices to each user. In such cases, Cloud Front signed URLs can be useful. Amazon S3 supports pre-signed URLs. However, the disadvantage is that the link expires in just seven days at maximum.
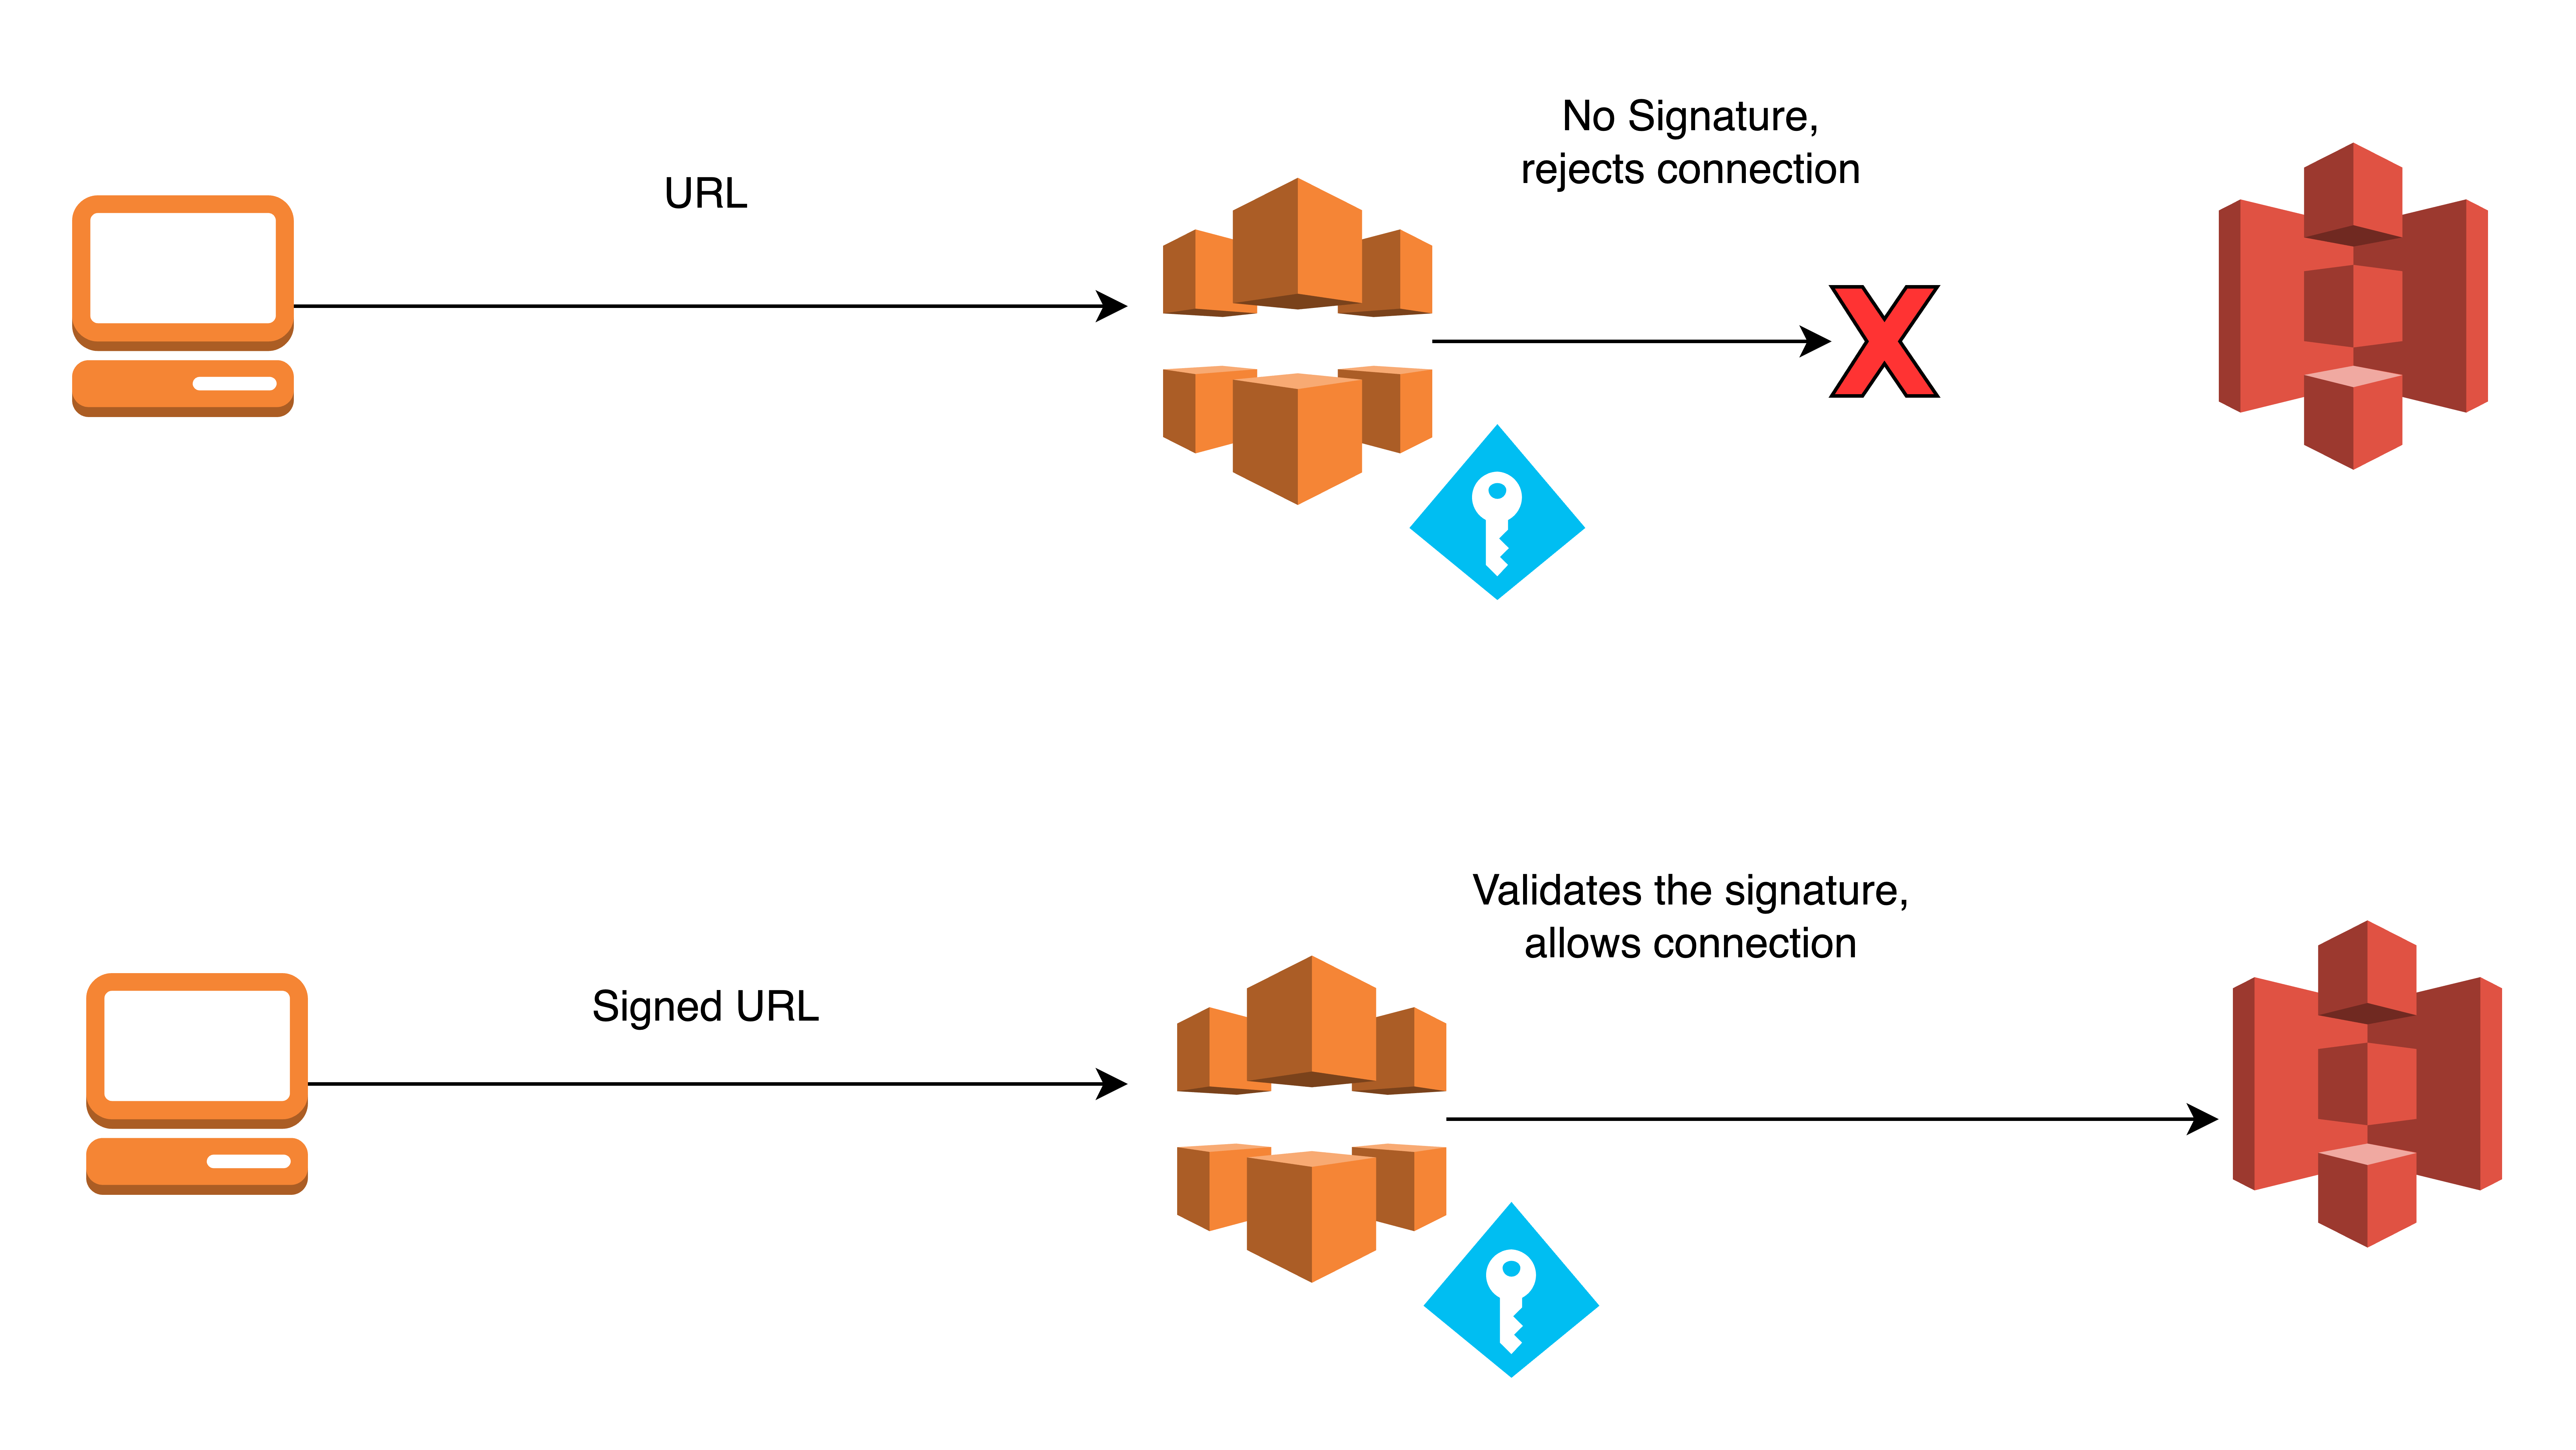
The flow we want to put into action resembles the image below.
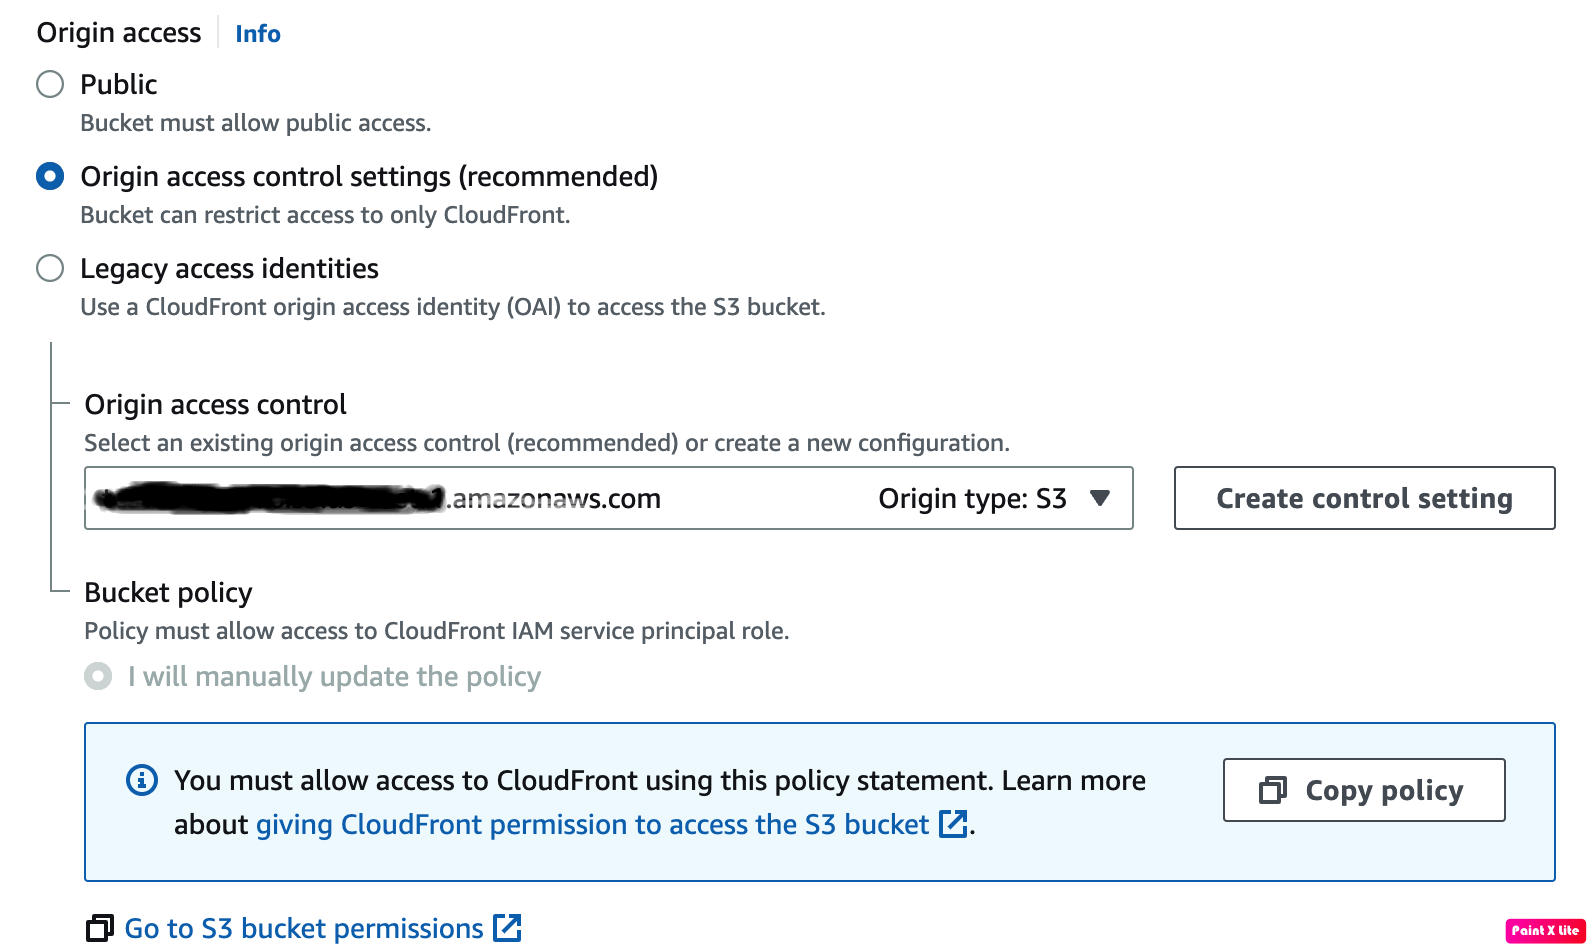
🚫 Prevent Public Access to S3 and Enable OAC in CloudFront
Before we restrict access to the file stored in the S3 bucket via CloudFront, we must disable public access to the contents inside the S3 bucket. We must also allow only CloudFront to access the data inside the S3 bucket using Origin Access Control (OAC).
🔑 Generate Key Files
To use CloudFront signed URLs, we need to generate key files. Upload the public key to the CloudFront key groups. Keep the private key secure and use it to generate the link to distribute to others.
Generate RSA keys with OpenSSL using these commands.
openssl genrsa -out private_key.pem 2048

openssl rsa -pubout -in private_key.pem -out public_key.pem
Upload a public key to generate a key ID. Use the key ID within the program to create a Signed URL. CloudFront uses this public key to check if the URL's signature is from the valid private key. Only valid signatures are authorized to retrieve content from the S3 bucket.
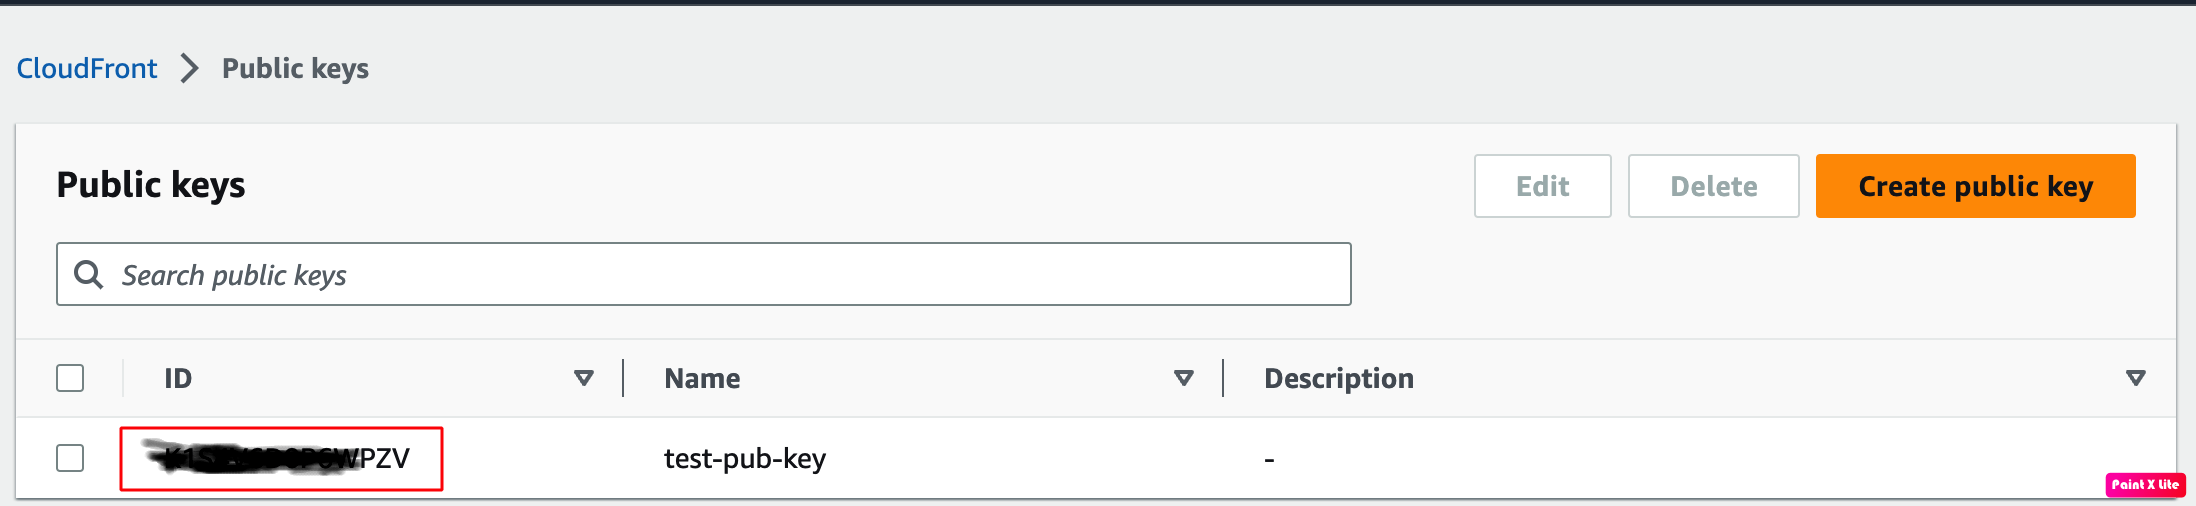
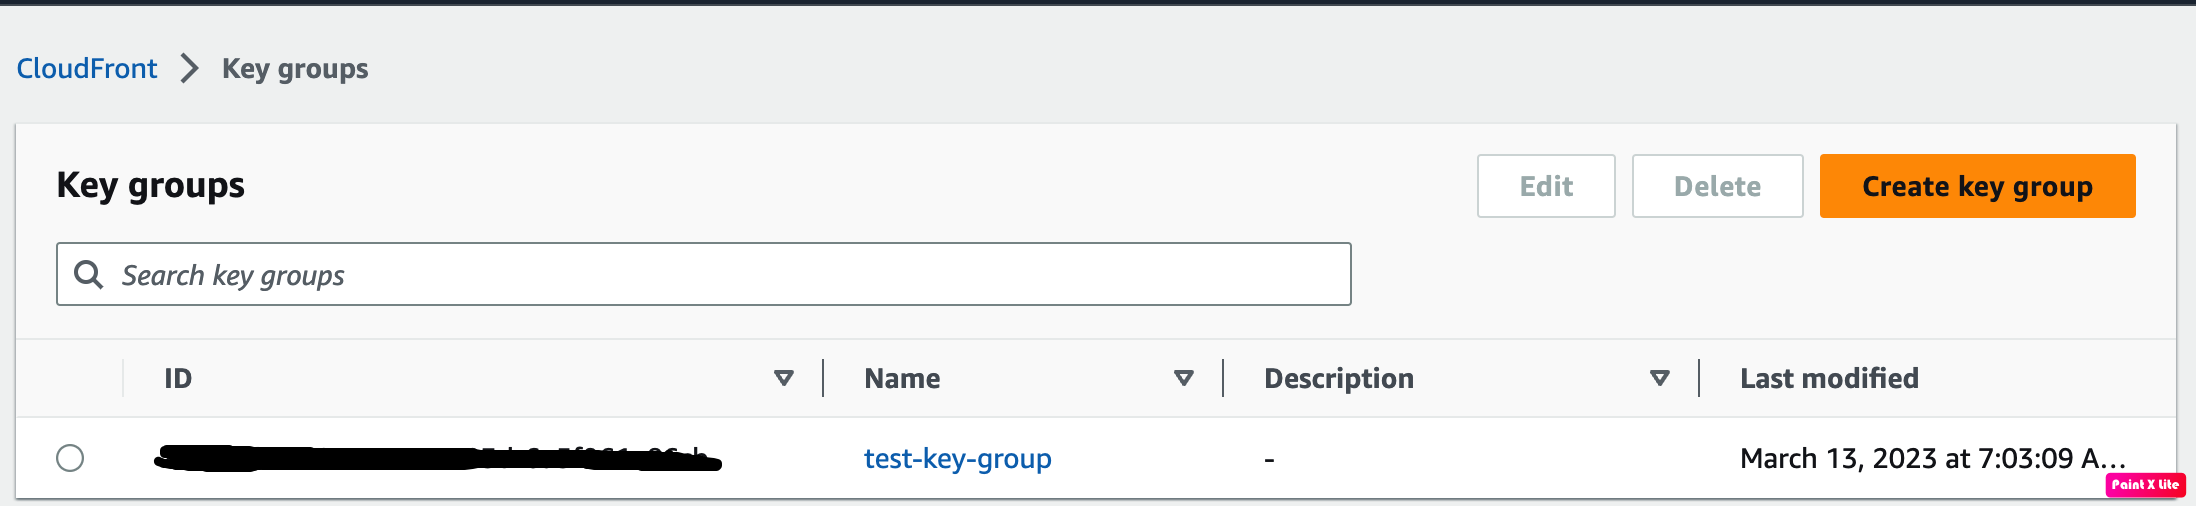
Create a Key Group in CloudFront with the public key you uploaded. This Key Group is necessary to set up the CloudFront distribution.
🔥 Restricting Access with CloudFront
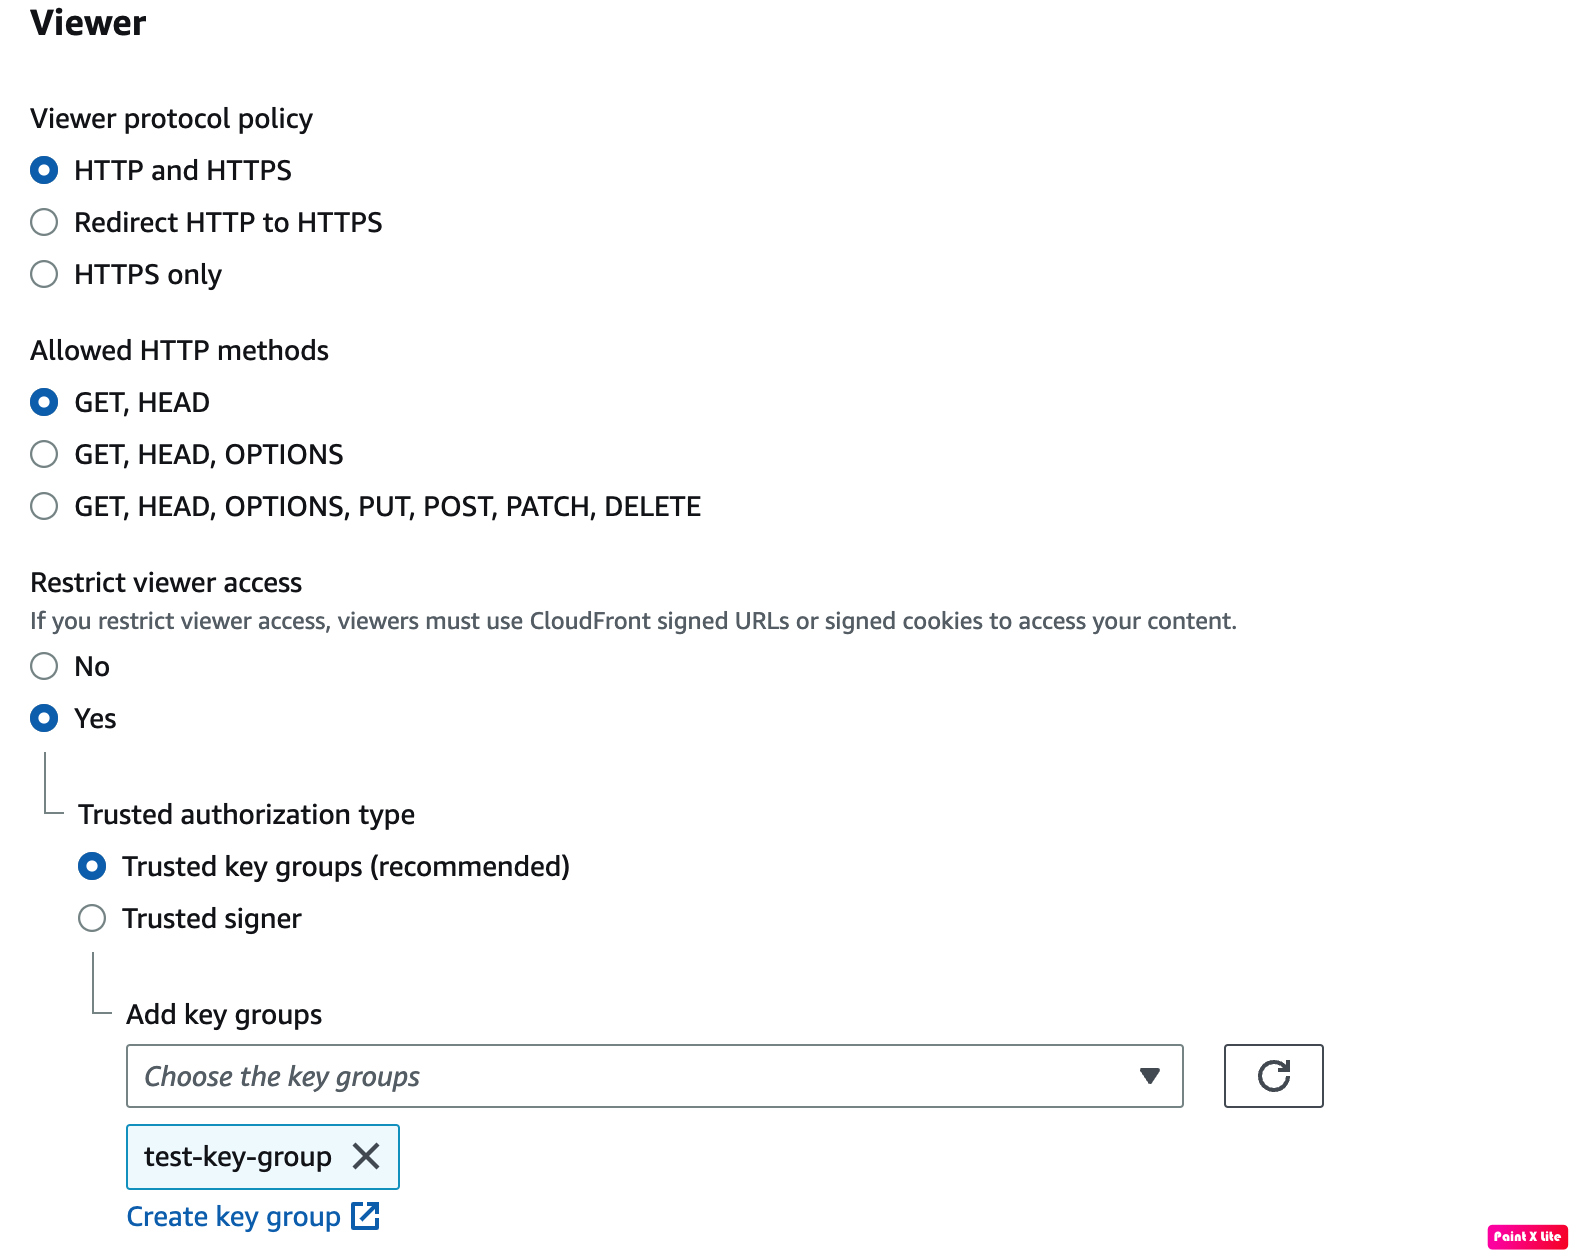
In the CloudFront Distribution Behaviour, we must enable the 'Restrict viewer access' option. We then select the trusted keys that we previously added as the authorization type.
Once the Key Groups are added, we can generate a signed URL from the application to access the content. Below is an example of Python code to generate the signed URL with the private key.
import datetime

from cryptography.hazmat.backends import default_backend
from cryptography.hazmat.primitives import hashes
from cryptography.hazmat.primitives import serialization
from cryptography.hazmat.primitives.asymmetric import padding
from botocore.signers import CloudFrontSigner


def rsa_signer(message):
    with open('location of private key', 'rb') as key_file:
        private_key = serialization.load_pem_private_key(
            key_file.read(),
            password=None,
            backend=default_backend()
        )
    return private_key.sign(message, padding.PKCS1v15(), hashes.SHA1())

key_id = '' # public key id from cloud front
url = '' # CloudFront URL
expire_date = datetime.datetime(2023, 3, 20) # expiry date

cloudfront_signer = CloudFrontSigner(key_id, rsa_signer)

# Create a signed url that will be valid until the specific expiry date
# provided using a canned policy.
signed_url = cloudfront_signer.generate_presigned_url(
    url, date_less_than=expire_date)
print(signed_url)
We can generate a link with a signature by entering the required values into the program and running the application.
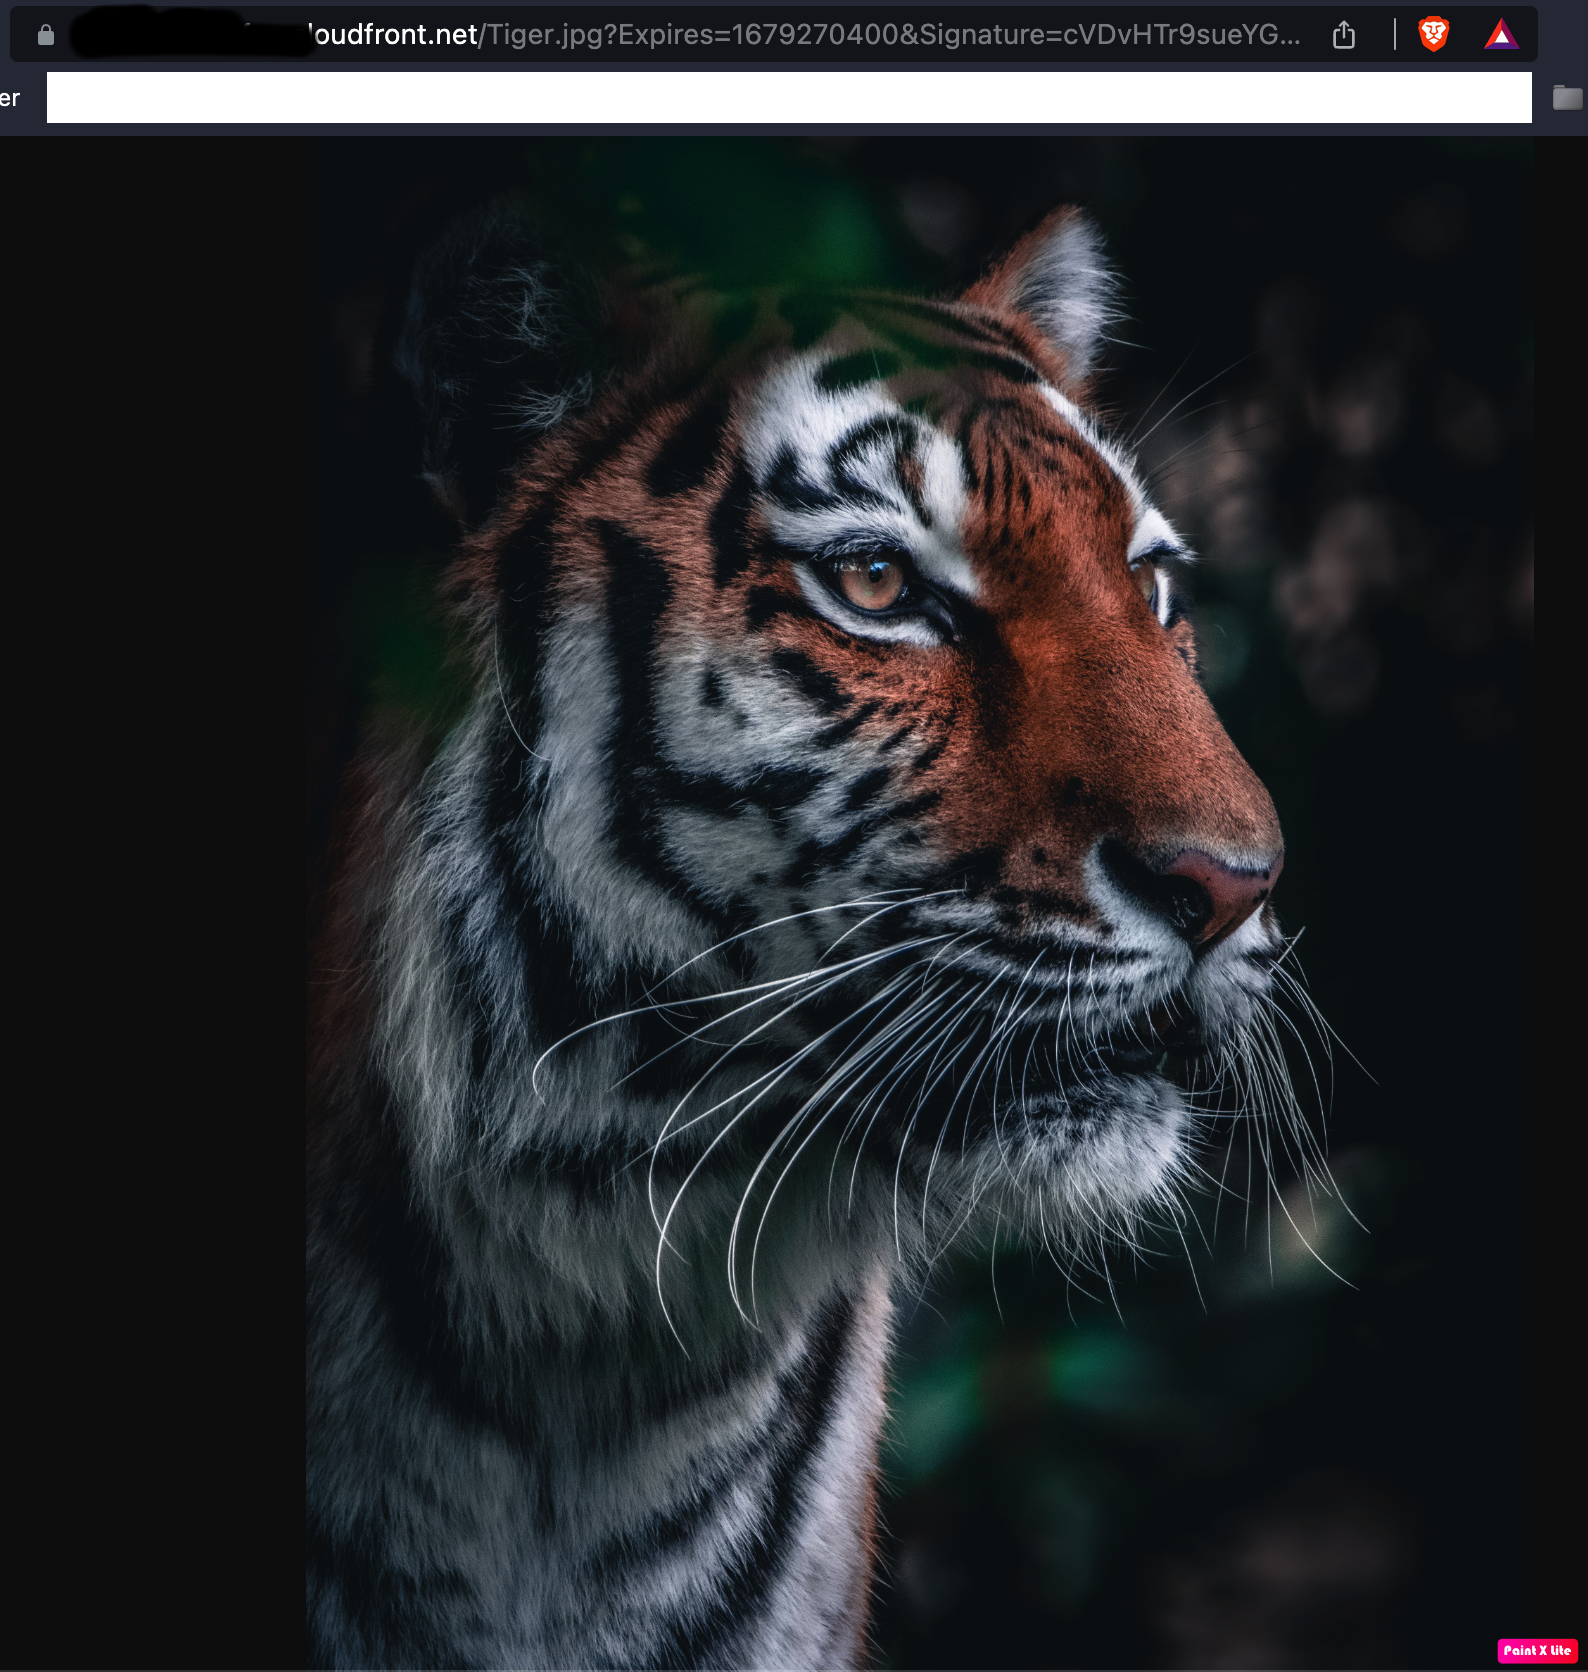
We can view the content by accessing it with the generated URL.
Without the correct URL, we won't be able to access the content.